6 Building Tips to Help You Decorate in Pokémon Pokopia
Topics: Pokemon, List, Nintendo, Nintendo Switch, Nintendo Switch 2
Topics: Pokemon, List, Nintendo, Nintendo Switch, Nintendo Switch 2
To anyone who needs to hear this, it’s okay if your biomes in Pokémon Pokopia look a mess.
I’m sure, like me, your social media feed is jam-packed with the most beautiful creations you’ve ever seen from gamers who have already invested upwards of 50 hours.
Well, I’m here to tell you that while that’s admirable, this isn’t reflective of the average gameplay experience, so you shouldn’t beat yourself up for any imperfections.
In fact, I’d urge you not to rush into building and decorating.
Advert
My approach was to just do enough to raise the environment level so I could unlock as many ‘mon, abilities, and items as possible.
I’d suggest you do the same, completing the main story before you return to decorate and build.
You’ll feel less overwhelmed as you’ll likely have already done some basic tidying up, plus you’ll be much better prepared to tackle the job of overhauling your five biomes.
It’s with all of that in mind that I’d like to highlight six tips that should help you create a beautiful series of islands in Pokémon Pokopia.
Players are able to visit Dream Islands. This is something you can actually unlock pretty early on.
You can lure in Drifloon in the Withered Wastelands using either three fires, known as the ‘Riding Warm Updrafts Habitat’, or the ‘Bed With a Plush Habitat’ which is more self explanatory.
Once he’s arrived, simply present a ‘doll’ to Drifloon to whisk you away to a Dream Island. You’ll find dolls dotted around the open-world. They’re actually plushes that take the form of Pikachu, Eevee, Growlithe, and more.

Each doll will prompt Drifloon to take you to a different Dream Island and you can only travel to one island per day.
There, you can farm crafting items. Essentially, each island specialises in a handful of crafting items which you’ll find scattered about.
You might be able to loot a load of seashells, for example, or small logs.
What plenty of players don’t know is that you can loot everything else on the island too.
Each Dream Island has at least one small structure. You can remove any furniture, windows, terrain blocks … you name it.
Dream Islands reset every single day so return the day after and that abode will be there like you never touched it.
It’s a great way of farming infinite loot so that you’re never short of supplies or decoration options.
This one is somewhat of a spoiler pertaining to what happens at the end of the game and specifically the Team Initiation Challenge in the Withered Wastelands, but I’ll keep things vague.
The lighthouse that once stood in this location will no longer be there in the post-game, allowing players to climb down a ladder where they’ll find a Magnemite.
If you complete Magnemite’s requests, you’ll unlock the game’s final and best skill, Magnet Rise.

This has several uses that are a huge help when building. It allows you to float and decorate in the air, which is a life saver when you’re applying roofs, building bridges, or trying to flatten entire mountains.
The skill also allows you to join blocks together. With this skill, you can place nine blocks as one giant square which is massively helpful if you’re trying to build a big ol’ path or road.
Once you’ve unlocked your first Pokémon Center, you’ll gain access to a 3D printer.
This is a great way of unlocking any in-game items you don’t yet have a recipe for.
Simply take a photo of said item. Make sure you press Y to switch to object mode when doing this.
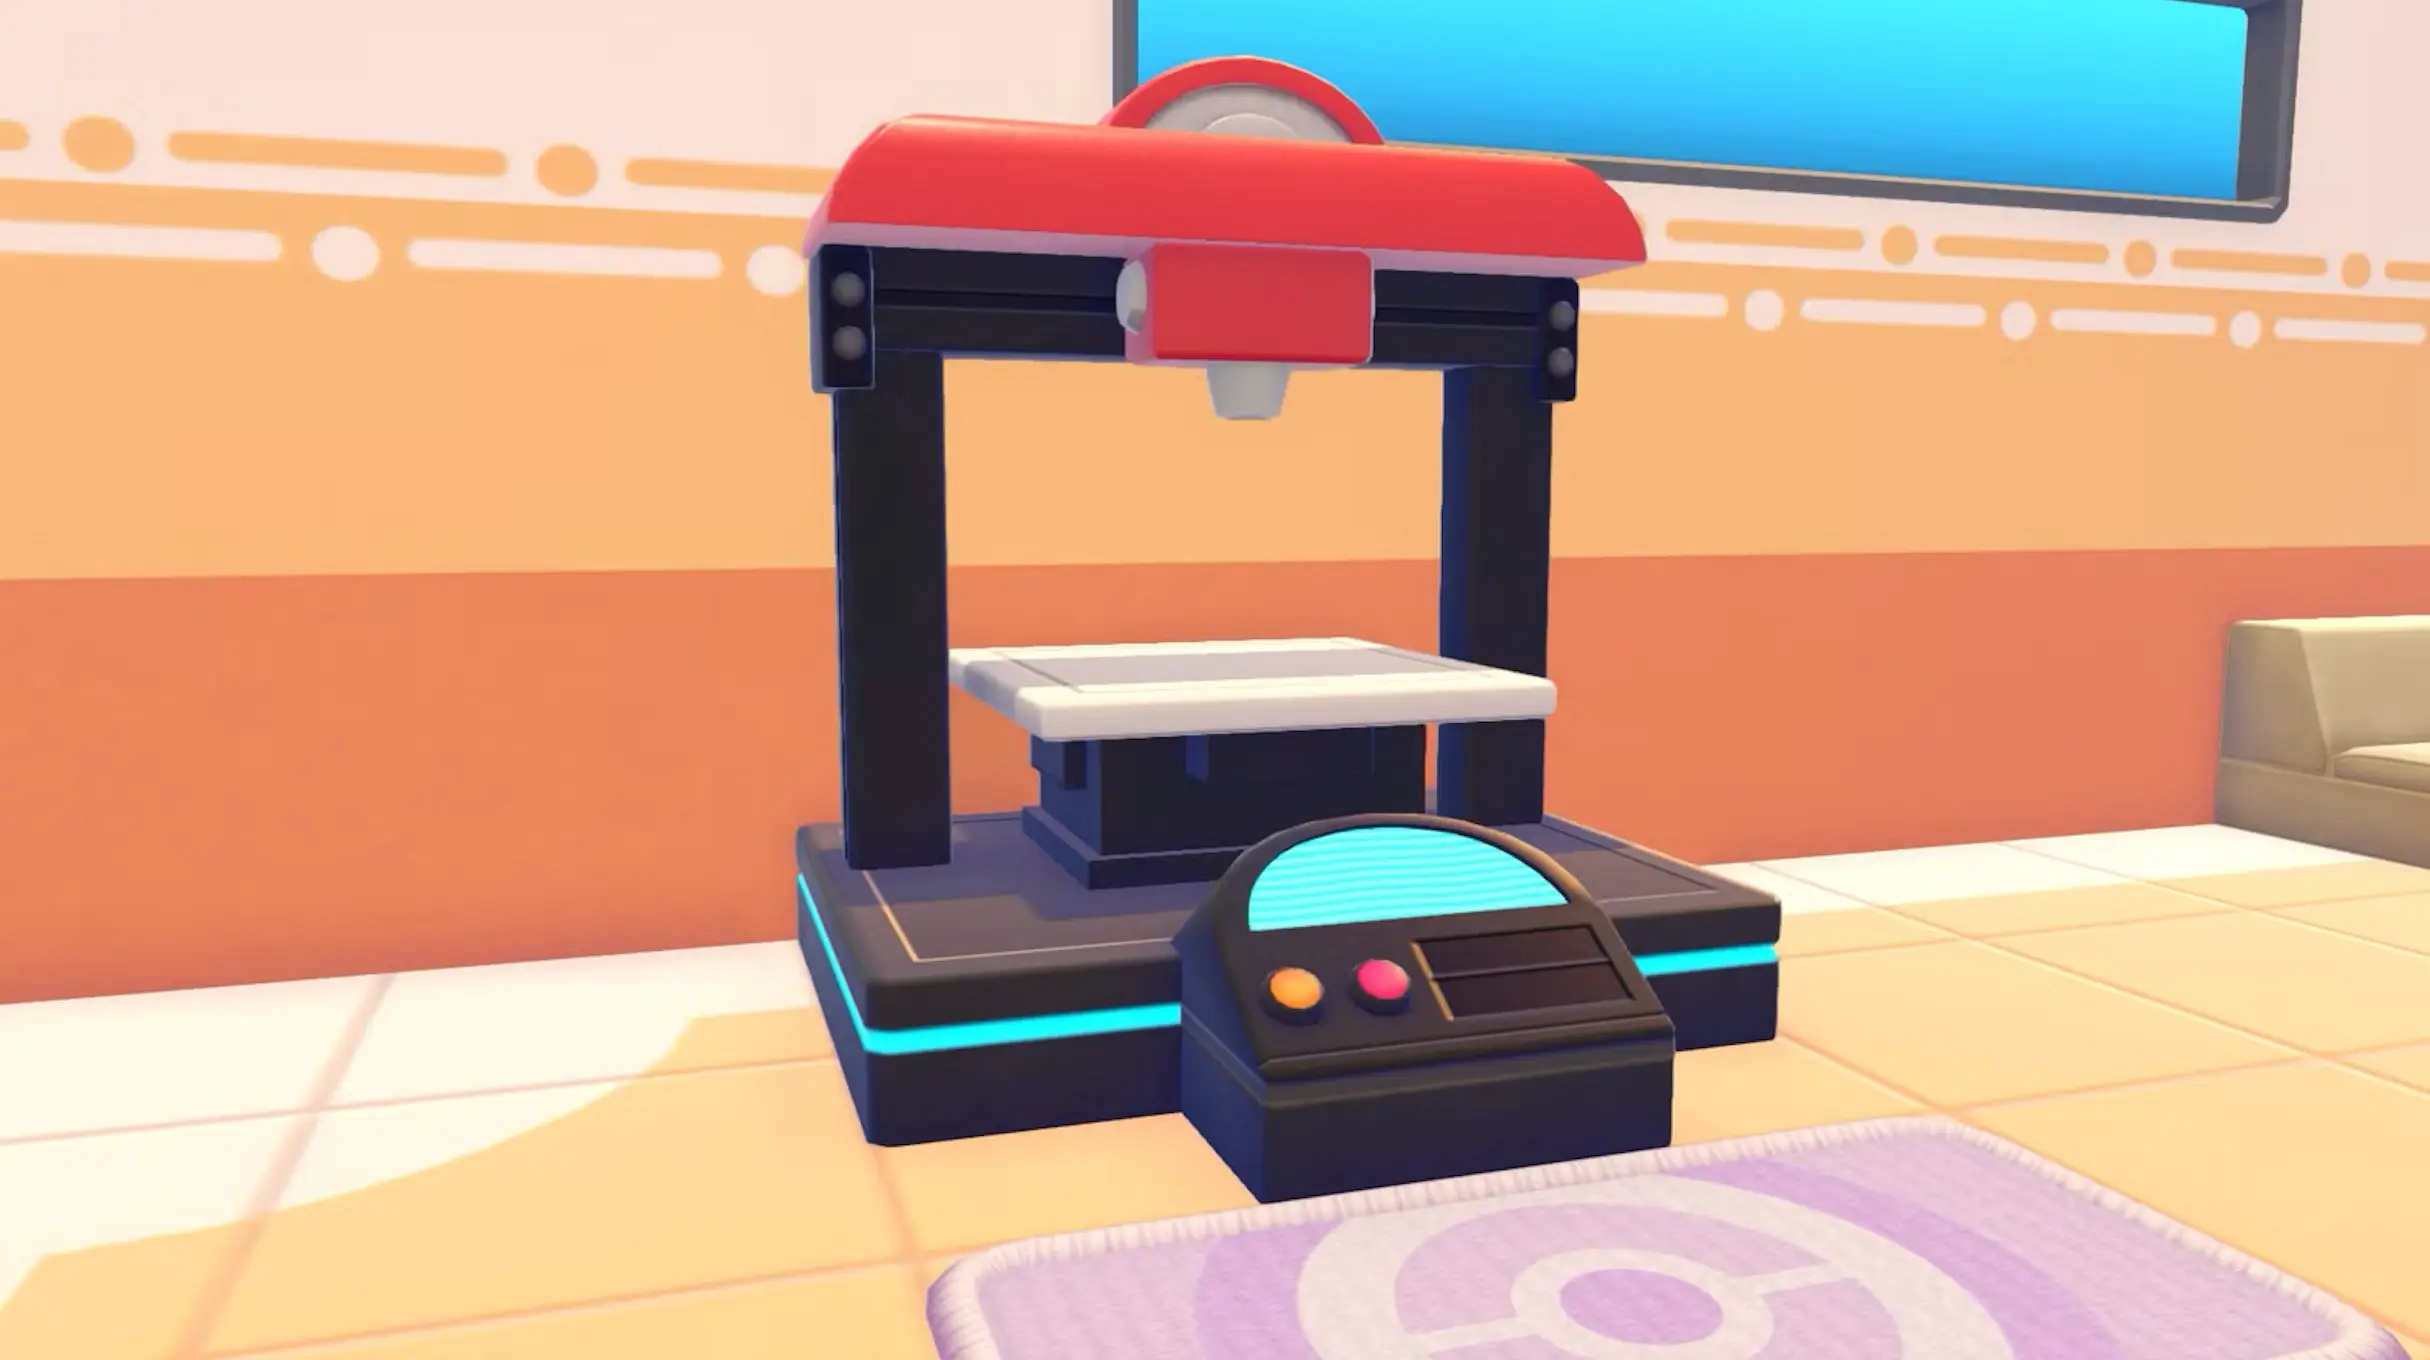
Then, head over to the printer making sure that you have a handful of Pokémetal Ingots available.
Select the relevant photo and the printer will create the item you were missing.
Certain items require rare Pokémetal Ingots instead. The Sky Dream Island is a great place to farm Ingots, accessed using Drifloon and the Dragonite doll.
There are two types of buildings within Pokémon Pokopia.
You can select from prefab options which are fixed dens, huts, and cottages that cannot be amended in terms of their external design. You can, of course, decorate their interiors.
These can be purchased from the PC Shop.
Then, there are the types of buildings you can create using blocks, roof tiles, doors, and windows.
You have total freedom to create whatever you want with this variety, although it’s worth pointing out you can still buy building kits from the PC shop for this type of building.
Unlike the prefab options though, you will be able to edit it after construction is complete.
I’d recommend you make use of prefab builds as you’re actually making your biome bigger by doing so.
Block buildings are only as big as they appear.
Prefabs are a bit like a Tardis. The exterior may be compact and modest, but the inside may reveal two floors with enough room to house four ‘mon and plenty of decor items.
If you want to give all of your ‘mon an indoor home or simply enjoy decorating indoor locations, this is the way to go.
Even if you upgrade your backpack, you’ll soon run out of room. Pokémon Pokopia is filled to the rafters with different item and block types.
This is why inventory boxes are your best friend.
There are plenty dotted around the various biomes but it can be easy to lose track of what you put where.
You’ve likely seen this trend online, but I highly suggest you build a storage room in the Withered Wastelands where you can keep everything in one location.
You can fast travel between your homes in each of the various biomes, so you won’t have an issue heading back to this locale to pick something up.
I’d recommend having a look online at the storage rooms players have created. You’ll need plenty of room to house all of the different items.
Storage boxes can be stacked, so make use of vertical space and stack several up.
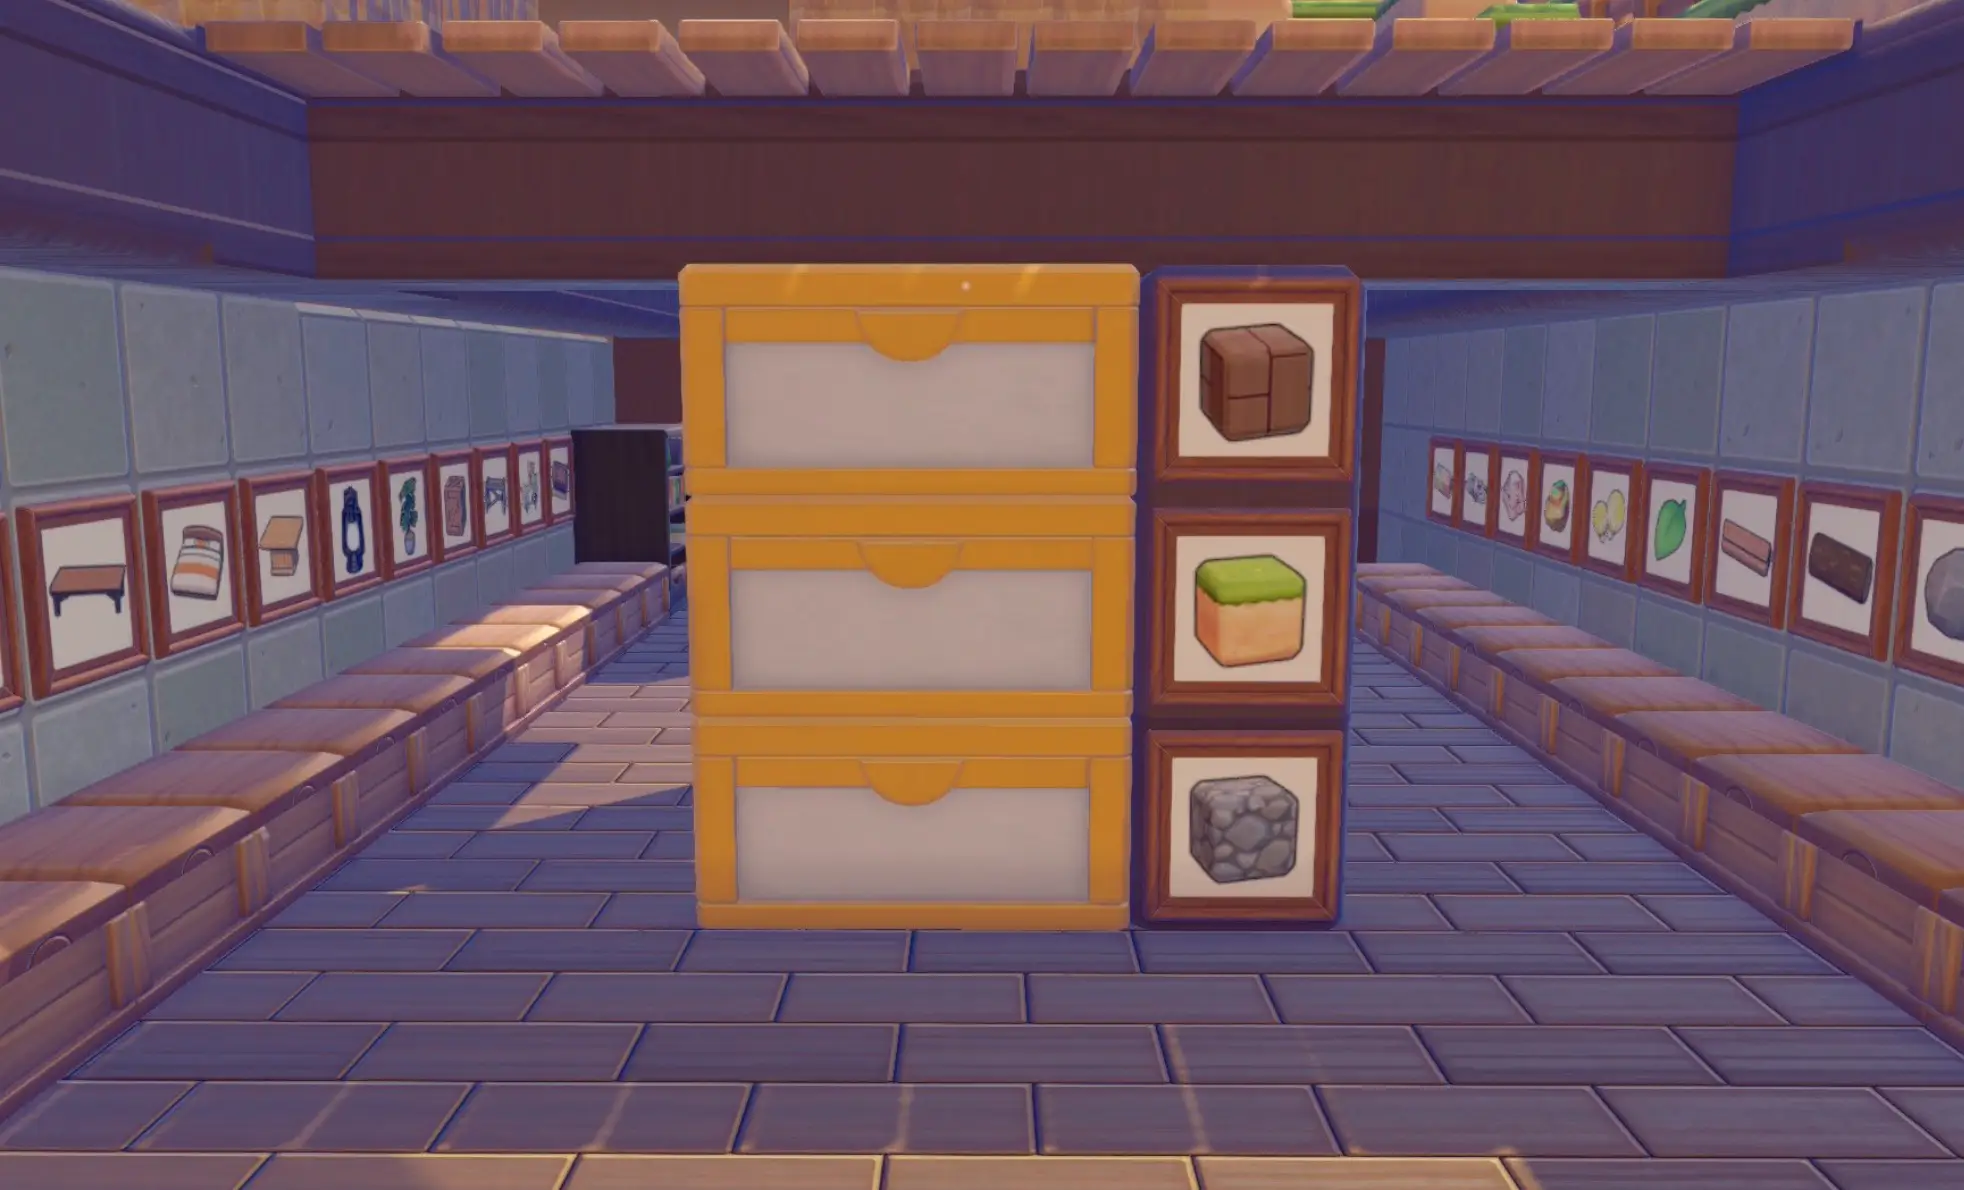
I’d then recommend applying a frame to each box. You can place any object into a frame regardless of whether it makes sense or not.
For example, have you filled a storage box purely with volcanic ash blocks? Put a frame on the front of the box, select a volcanic ash block, and then select ‘place’.
The frame will then display a picture of the item labelling exactly what it is you have inside.
You’ll never be short of a specific item again. This is especially helpful if you make a habit of looting Dream Islands as you’ll need somewhere to store all of your wares.
In the Withered Wastelands, you’ll likely find an area hidden away behind the Pokémon Center featuring a couple of water wheels.
I was able to get one running by punching through various blocks and linking to a nearby water source.
The second water wheel though I could not get to budge. There was no natural water source nearby and water only travels so far before it lacks the force to go on.
If you’re in the same predicament and don’t understand how players are creating beautiful creations surrounded by waterfalls, it’s because you just haven’t unlocked that mechanic yet.
There are two parts to this. The ability to suck up water can be unlcoked in Bleak Beach. For me, the quest didn’t spawn until after I’d completed the important request of restoring electricity.
Piplup kickstarted the quest and tasked me with luring in Wooper before Wooper taught me the trick.
I was then able to suck up and release water anywhere I wanted, thus filling up and creating new pond areas.
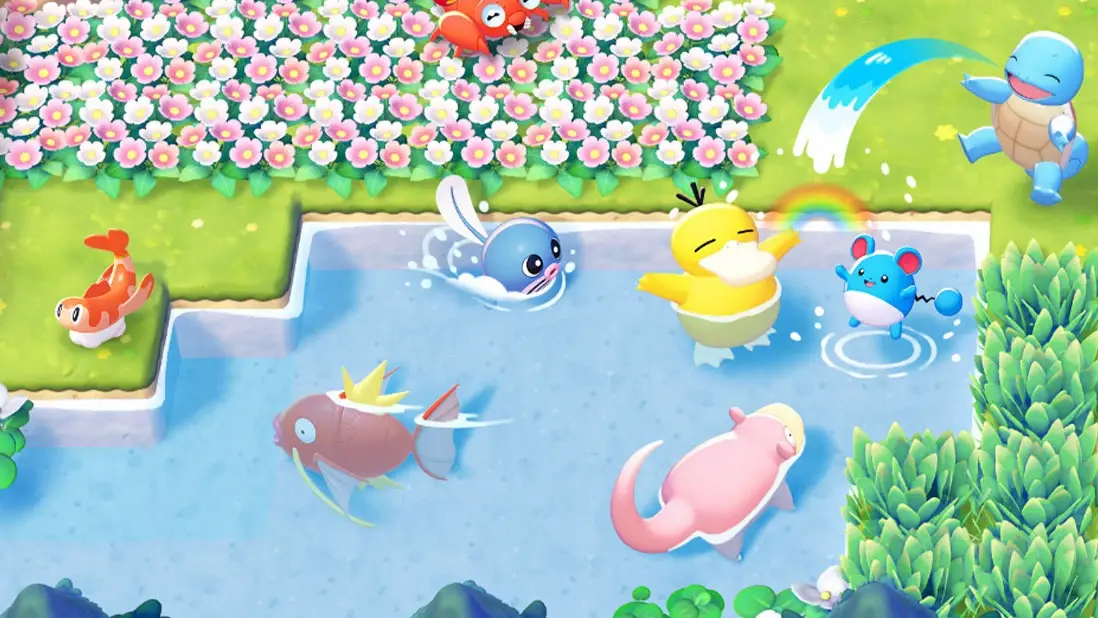
In the Sparkling Skylands, you’ll find Gyarados at the bottom of an enormous waterfall.
Chatting to this iconic ‘mon will simply prompt him to teach you how to form a waterfall. You’re now fully equipped to design and create new water sources.
Hopefully that sets you up nicely because as incredible of a game as Pokémon Pokpia is, it doesn’t exactly tell you what’s to come - and there’s so much that can make your life way easier.